How to Hang Wallpaper: A Masterclass in Pristine Wallcovering Installation
Wallpaper has staged an incredible resurgence in modern interior design, evolving from an old-fashioned styling choice into a bold tool for self-expression. From large-scale botanical prints and geometric patterns to rich, tactile textured silks, wallcoverings inject unparalleled personality into a home. However, learning how to hang wallpaper properly requires an exceptional level of precision, meticulous mathematics, and an eye for detail. A single misaligned seam or poorly prepared surface can easily ruin a costly designer roll. At Fine Finish Decorative, our professional installers specialize in executing flawless pattern matches and pristine seams, transforming ordinary rooms into breathtaking custom spaces.
Whether you are looking to install a dramatic feature wall behind your bed or wrap an entire dining room in a luxurious texture, understanding the basic mechanics of installation is essential. This comprehensive guide details the foundational steps, specialized tool kits, and tricky spatial adjustments required to achieve an unblemished, professional finish.
Essential Tools and Preparation for Wallpaper Hanging
Before you open a single roll of paper, you must assemble the correct gear and prepare the underlying canvas. Skimping on surface preparation is the most common reason wallpapers fail to adhere correctly or bubble down the road. When planning a wallpaper hanging project, your preparation checklist must be comprehensive.
The Professional Toolkit
Premium wallpaper paste (selected based on paper weight).
Plumb line or laser level (indispensable for straight panels).
Sharp snap-off utility knife (blades must be changed frequently).
Wallpaper smoothing brush or flexible plastic smoothing tool.
Seam roller and a clean, damp sponge for wiping away excess paste.
A pasting table and a high-quality tape measure.
Wall Surface Preparation
Walls must be completely smooth, clean, and dry. Any old paper must be thoroughly stripped, and remaining adhesive washed away. Fill all small cracks or holes with a premium spackling compound and sand them flat. Finally, apply a layer of “wallpaper primer” or “size.” This critical step seals porous plaster, prevents the paste from soaking into the wall too quickly, and allows the paper to slide easily into position during alignment.
Step-by-Step Installation Process
If you want to master how to hang wallpaper, you must discard the idea of relying on corners or door frames as straight guidelines. Houses settle over time, and walls are rarely perfectly square.
Establish the Plumb Line: Measure the width of your roll, subtract an inch, and mark this distance from your starting corner. Use a laser level or plumb line to draw a perfectly vertical line down the wall. This line serves as your absolute guide for the very first panel.
Paste Application: Depending on your paper type, you will either apply adhesive directly to the backing of the paper (Paste-the-Paper) or roll the adhesive directly onto the wall surface (Paste-the-Wall). Ensure even coverage without leaving any dry patches.
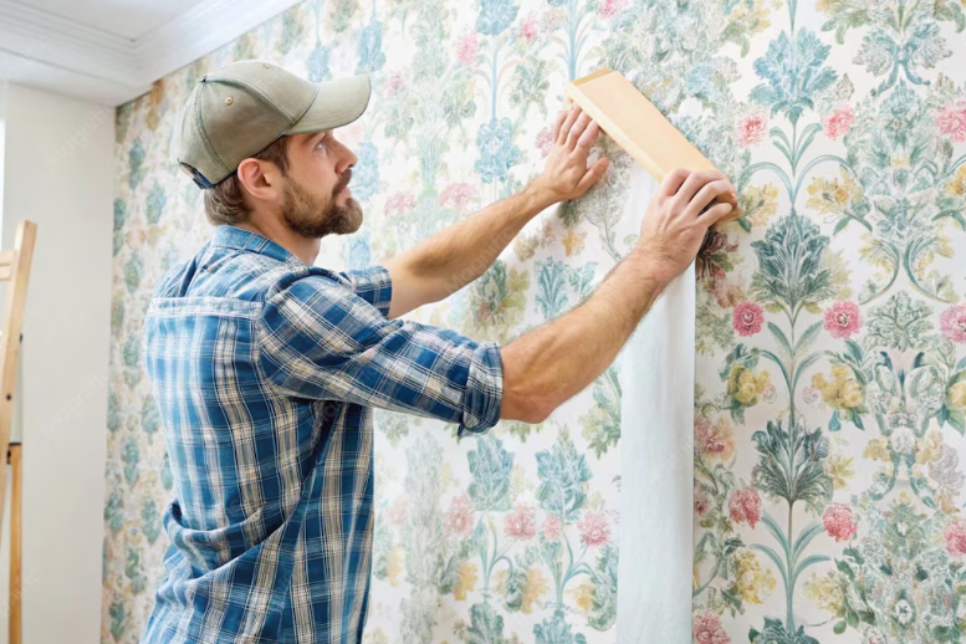
Hang the First Length: Unroll your first panel, leaving roughly 2 inches of excess paper at the top ceiling line and the bottom baseboard. Align the side edge of the paper perfectly against your drawn plumb line.
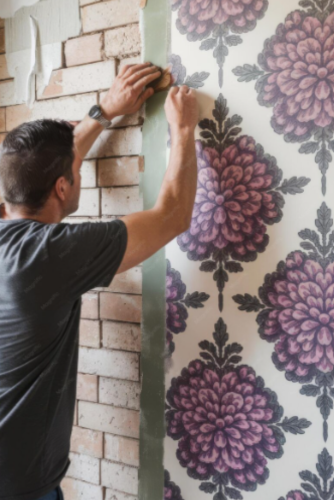
Smooth from the Inside Out: Use a soft wallpaper smoothing brush to gently press the paper onto the wall. Work from the center outward to push out trapped air bubbles and eliminate creases.
Trim the Excess Excess: Use a wide putty knife as a straight edge guide along the ceiling and baseboard, and cut away the excess paper using a brand-new, razor-sharp utility blade. Wipe down any surface paste immediately with a clean, damp sponge.
Advanced Techniques: How to Hang Wallpaper Around a Window
Hanging paper across a flat, uninterrupted wall is relatively straightforward, but dealing with architectural obstacles introduces complex challenges. Learning how to hang wallpaper around a window requires patience, careful measurements, and precise relief cuts to prevent tearing.
Approach with Care: Run your wallpaper length directly over the face of the window frame as you approach it, allowing the loose paper to drape naturally over the opening.
Execute Diagonal Relief Cuts: Locate the exact corner point of the window frame. Using sharp scissors, make a precise diagonal cut from the waste paper area directly inward to that corner point. This instantly relieves the tension on the paper, allowing you to fold the excess flaps neatly into the window recess or trim them clean along the outer casing.
Smooth and Wrap: Press the paper firmly into the internal angles of the window frame. Use your smoothing tool to ensure absolute contact with the wall inside the recess before carefully trimming away the waste along the window pane edge.
Maintain Pattern Continuity: When cutting pieces to fit above and below the window opening, double-check that the patterns align perfectly with the main panels on either side.
Common Pitfalls to Avoid During Installation
Even seasoned DIY enthusiasts run into complications when working with delicate or intricate wallcoverings. Being aware of these pitfalls will save you time and material costs during your wallpaper hanging journey:
Using Dull Blades: A slightly dull utility blade will tear wet wallpaper instead of cutting it cleanly. Change your blade after every few cuts to ensure clean, invisible edges.
Over-stretching the Paper: When trying to align a stubborn seam, never pull or stretch the paper horizontally. As the paste dries, the wallpaper will shrink back to its original shape, leaving ugly, visible gaps between panels.
Leaving Trapped Paste: If excess adhesive squeezes out of a seam onto the face of the paper, it must be wiped away gently with a clean, damp cloth immediately. If left to dry, it can stain the print or leave a shiny, unappealing residue.
Conclusion: Achieve Perfection with Fine Finish Decorative
Mastering the art of wallpaper installation takes years of daily practice and a deep understanding of varied materials, from delicate papers to heavy-duty commercial vinyls. If you are dealing with premium designer wallcoverings, leaving the installation to seasoned artisans eliminates the risk of costly mistakes.
At Fine Finish Decorative, we take immense pride in delivering breathtaking wallcovering installations with flawless pattern matches and invisible seams. Contact us today to discuss your next home upgrade and let us transform your space seamlessly.